How to Slip Stitch
The slip stitch is the shortest of all crochet stitches. Slip stitches have many uses in crochet. They can be used to add a decorative touch to a finished piece of crochet fabric. They can be used to add a horizontal line across a row of stitches. They can be used to create unique stitch patterns. They can be used to move the yarn across the fabric without adding the full row height so that you do not have to cut and rejoin the yarn to skip over stitches. They can be used to join new balls of yarn to your work. They can be used to join the end of a round to the start of a round when working a project in circles or tubes.
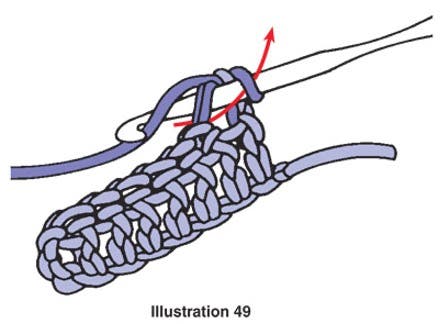
To create a slip stitch, you will insert your hook into a stitch or chain, yarn over the hook (from back to front), then draw the loop through the stitch and the loop on the hook all in one motion.
When working rows that only contain slip stitches, chain 1 at the start of the row to build up the height of the row and then work slip stitches across.
How to Use the Slip Stitch to Decrease
This is how you can use slip stitches to decrease your stitch count or move the start of your row in from the edge of the fabric without cutting the yarn.
Row 1: First, make a slip knot or twist start and then make the number of chains stated in the pattern (for this sample chain 10). Double crochet in the fourth chain from the crochet hook and in each chain across. Turn work.
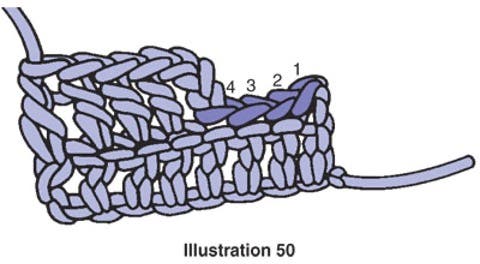
On the next row, you are going to slip stitch across the first four stitches before beginning to work double crochet again. This is how you move in from the edge of your fabric. You are essentially decreasing the double crochet stitches because you will now have fewer of them in the row.
Row 2: Instead of making three chains for the turning chain as you would usually do for a row of double crochet, this time just chain one. The turning chain-one does not count as a stitch; therefore, insert the crochet hook under both loops of the first stitch, yarn over and draw the yarn through both loops of the stitch and the loop on the hook; you have completed one slip stitch.


Work a slip stitch in the same manner in each of the next three stitches.
Finish the row in double crochet. First, chain three to get yarn at the right height (the chain-three counts as a double crochet), then work a double crochet in each remaining stitch.
You can see how this moved the yarn across the work with slip stitches and added very little height.


How to Use a Slip Stitch to Join an Chain Into a Circle
This is how to use a slip stitch to join a chain into a circle. Knowing how to join a chain into a circle is important as it is the way many hats and motifs, such as granny squares, are started.
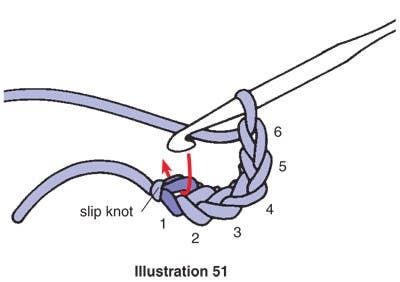
First, make a slip knot or twist start and then make the number of chains stated in the pattern (for this sample chain six). Next, insert the crochet hook through the first chain you made, which is next to the slip knot.


Yarn over and draw the yarn through the chain and through the loop on hook; you have now joined six chains into a circle or a ring.
How to Use a Slip Stitch to Join the End of a Round to the Beginning of the Same Round
This is how to use a slip stitch to join the end of one round to the beginning of the same round. This is used when working projects in the round in a tube or circular shape.
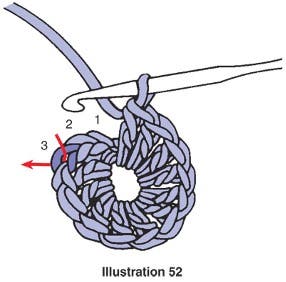
First, make a slip knot or twist start and then make the number of chains stated in the pattern (for this sample chain six). Next, join the chain-six with a slip stitch in the first chain you made to form the ring.
Chain 3, then work 11 double crochet into the center of the ring. Insert the hook into the third chain of the beginning chain-three. Yarn over and draw it through the chain and through the loop on the hook; you have now joined the round of double crochet.


