|
Paper Piecing
Paper piecing allows a quilter to make blocks with odd-shaped and/or small pieces and more precise corners. Fabric pieces are sewn together onto the reverse side of a paper-piecing pattern, and then the paper is carefully removed when the block is completed. You may have to rethink how you piece when using this technique, and it does require a little more yardage.
1. Make same-size copies of the paper-piecing pattern as directed in the pattern. There are several choices in transparent papers as well as water-soluble papers that can be used, which are available at your local office supply store, quilt shop or online. Some papers can be used in your printer.
2. Cut out the patterns leaving a margin around the outside bold lines as shown in Figure A. All patterns are reversed on the paper copies. Pattern color choices can be written in each numbered space on the marked side of each copy.
|
 |
3. When cutting fabric for paper piecing, the pieces do not have to be the exact size and shape of the area to be covered. Cut fabric pieces the general shape and 1/4"1/2" larger than the design area to be covered. This makes paper piecing a good way to use up scraps.
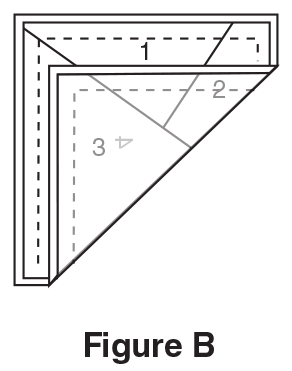
4. With the printed side of the pattern facing you, fold along each line of the pattern as shown in Figure B, creasing the stitching lines. This will help in trimming the fabric seam allowances and in removing the paper when you are finished stitching. Note: You can also machine stitch along the lines with a basting stitching and no thread to perforate the paper.
|
 |
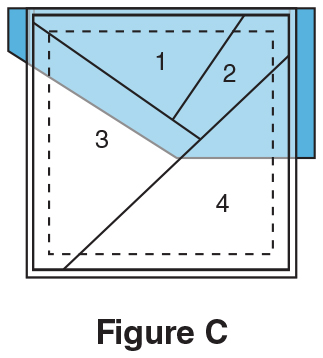
5. Turn the paper pattern over with the unmarked side facing you and position fabric indicated on pattern right side up over the space marked 1. Hold the paper up to a window or over a light box to make sure that the fabric overlaps all sides of space 1 at least 1/4" as shown in Figure C from the printed side of the pattern. Pin to hold fabric in place. Note: You can also use a light touch of glue stick. Too much glue will make the paper difficult to remove.
|
 |
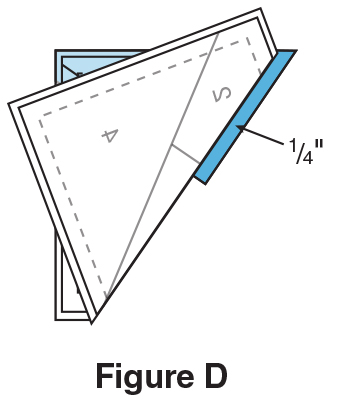
6. Turn the paper over with the right side of the paper facing you, and fold the paper along the lines between sections 1 and 2. Trim fabric to about 1/4" from the folded edge as shown in Figure D.
|
 |
7. Place the second fabric indicated right sides together with first piece. Fabric edges should be even along line between spaces 1 and 2 as shown in Figure E. Fold fabric over and check to see if second fabric piece will cover space 2.
|
 |
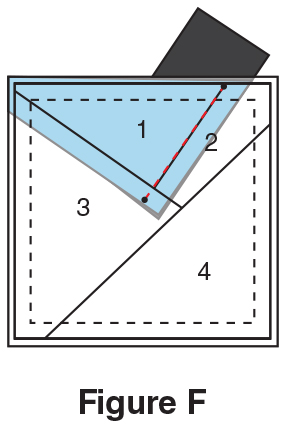
8. With the right side of the paper facing you, hold fabric pieces together and stitch along the line between spaces 1 and 2 as shown in Figure F using a very small stitch length (1820 stitches per inch). Note: Using a smaller stitch length will make removing paper easier because it creates a tear line at the seam. Always begin and end seam by sewing two to three stitches beyond the line. You do not need to backstitch. When the beginning of the seam is at the edge of the pattern, start sewing at the solid outside line of the pattern.
|
 |
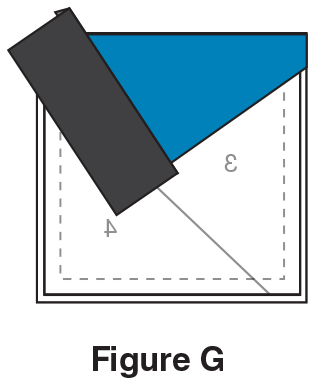
9. Turn the pattern over, flip the second fabric back and finger-press as shown in Figure G.
|
 |
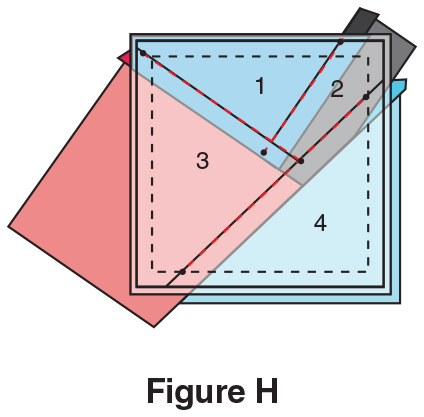
10. Continue trimming and sewing pieces in numerical order until the pattern is completely covered. Make sure pieces along the outer edge extend past the solid line to allow for a 1/4" seam allowance as shown in Figure H.
|
 |
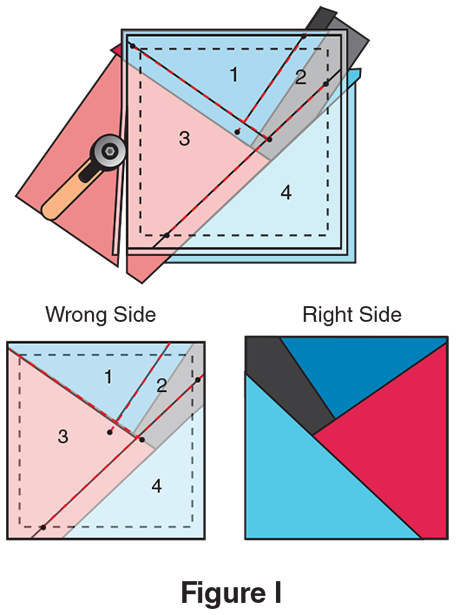
11. When the whole block is sewn, press the block and trim all excess fabric from the block along the outside-edge solid line of paper pattern as shown in Figure I.
|
 |
12. After stitching blocks together, carefully remove the backing paper from completed blocks and press seams. Or staystitch 1/8" from the outer edge of the completed block. Carefully remove backing paper and press seams. Then complete quilt top assembly. |
|
|
|
|
