|
Prairie Points
Easy to make, prairie points are a fun addition to quilt edges or even as insertions in blocks or borders to give your quilt depth and movement with a sawtooth detail.
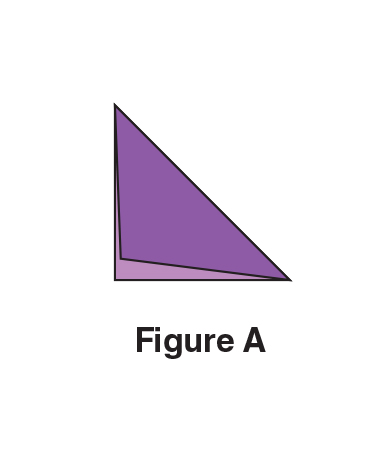
1. Fold a square in half diagonally (Figure A) and press. |
 |
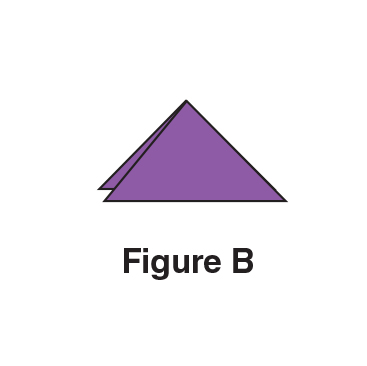
2. Fold in half again and press referring to Figure B. |
 |
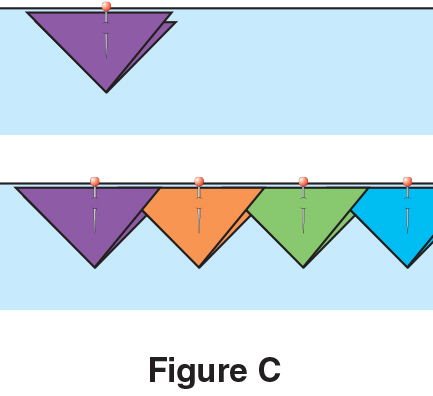
3. To add prairie points to a seam, pin the first point to the seam edge and then tuck the consecutive prairie point ends between the folds of the previous prairie points and pinning in place (Figure C). Baste the prairie points in place.
|
 |
To use prairie points as a binding embellishment on quilted projects:
4. After quilting and trimming the quilt top, batting and backing even, add prairie points around the quilt edges referring to step 3, with prairie points pointed toward the quilt center. Baste to hold in place. Note: Adjust how far the points are inserted together for even spacing. Finish quilt with binding.
5. Layer batting; quilt backing, right side up, and quilt top, right side down. Stitch around quilt top edges leaving a turning opening along one edge. Note: Turning openings should reflect the size of the project. A small project will not need as large a turning opening as a full size quilt.
6. Trim batting close to the seam and backing even with quilt top. Turn quilt right side out, pulling prairie points away from the seam. Turn seam allowance toward inside and pin in place over the prairie point raw edges. Hand-stitch opening closed. |
|
|
|
|
