
Copic Tutorial - How to Color Fabric with Copic Markers
By Colleen Schaan
Whether it’s a flag waving in the wind or a dress draping down a leg, fabric has movement. Showing that movement through coloring can be intimidating, but it doesn’t have to be. This month’s Copic® tutorial shows how to create the look of fabric and show movement through color.
Coloring Fabric Folds with Copic Markers
There are many different approaches to coloring folds in fabric. The technique differs slightly depending on whether you want to create the look of sharp pleats or billowy draping folds.
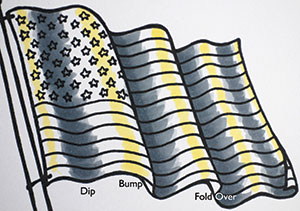
Fabric folds are made up of three distinct parts.
Dip -- any area of fabric that flows or moves away from the viewer.
Bump -- any area of fabric that moves toward or closer to the viewer.
Fold Over -- any area of fabric that actually folds over on itself and allows the viewer to see the back or underside of the fabric.
Note: For this Copic tutorial, I am using the viewer as the light source.
To begin, stamp image twice onto white cardstock.
Using one of two images, create a "coloring guide" for the fabric areas to identify the dips, bumps and folds. Using a dark gray Copic marker (C5), color all of the areas that are dips. Using a dark yellow marker (Y13), color all of the areas that are bumps. Notice the dips at the edges of the fold-over areas (Photo 1).
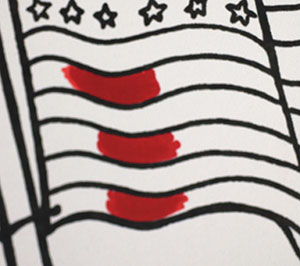
Using your guide as a reference tool, begin coloring the second stamped image. Start by adding a dark Copic color (R27) to the shadowed "dip" areas of the fabric (Photo 2).
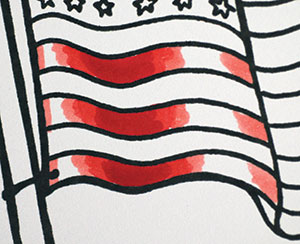
Add additional Copic colors (R24, R22) to the image, moving toward the highlighted "bump" areas. Leave the bump areas white. This is the initial stage and you are just laying down color to identify highlights and shadow areas. No blending is done yet (Photo 3).
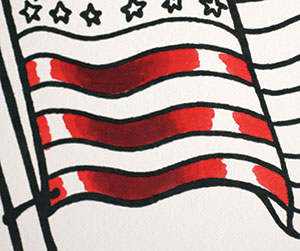
Darken the original dip areas and continue to layer and blend colors Copic out toward the bump areas (R39, R29, R27, R24). Keep bump areas white. This step may need to be repeated a few times to create the dark shadows and smooth blends (Photo 4).
Smooth any remaining blends and cover bump areas with the lightest Copic color (R22). This will fill in the highlights but keep them very light (Photo 5).

Color each section of fabric in the same manner, paying close attention to any fold over areas. When the fabric folds completely over, add a very dark (RV99) cast shadow to the dip area directly next to the fold. Remember to also color the revealed backside of the fabric with a darker shade (Photo 6).
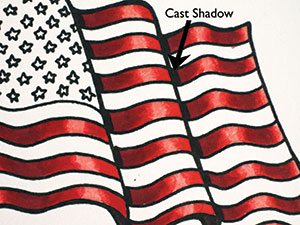
Color each section of fabric to complete the image (Photo 7).

This Copic tutorial was first published in the July 2012 issue of CardMaker magazine. To get more information on Copic marker techniques:
- Purchase a copy of Colleen's book Copic Coloring Guide.
- Check out Colleen's blog, www.distinctivetouches.com.
- Subscribe to CardMaker magazine, where Colleen has a regular column featuring Copic marker techniques.


